
If you own a Mac, there is a good chance that you have spent a lot of money to buy it. If for no other reason, you must take care of your computer. Not only will it work better over its lifetime, but you can also potentially sell it for more money if you decide to dispose of it. In this tutorial, we will share some tips on how to care for your Mac. It is impossible to cover the topic of computer maintenance from all angles, so think of this guide as another introduction to some organizational features and applications that you may not know about.
How to clean your Mac screen and body
While there are many products you can buy that are specially made to help you clean your computer, I have found that the simplest approach works best – and that is what Apple recommends. To start, you just need a little water in a spray bottle and a clean microfiber cloth. You can use regular or distilled water. The advantage of the latter is that it is much less likely to leave any residue on your Mac, especially on the screen. You can buy distilled water at a grocery store or make it yourself with some simple kitchen utensils. Either way, it is more affordable than dedicated cleaning solutions and more versatile. If you don’t already have microfiber cloths, Amazon sells bundles of 24 affordable bundles that you can get for about $ 15.
Two other products that I have found that can make work easier are the Whoosh screen cleaner and Giottos Rocket Blower. I can’t say enough good things about the latter. This will prevent you from buying expensive and useless compressed air cans. Finally, if you want to disinfect your computer, Apple recently said it is safe to use isopropyl alcohol and Clorox wipes.
As for the process of cleaning your Mac, the most important tip to remember is to start with a clean cloth (this is part of the reason why we recommend buying them in bulk). You will save time and frustration that way. Start by turning off the computer and disconnecting it. If you went out and bought a Rocket Blower, use it now to remove any dust. If not, take a dry microfiber cloth and examine the computer. Take special care with the keys, especially if you have a Mac with a butterfly keyboard.
At this point, you can clean the computer with a disinfectant cloth. Otherwise, moisten one side of the cleaning cloth with water or Whoosh. Never spray any liquid directly on the computer. You will have more control that way and prevent any moisture from entering the inside of your Mac. I always clean the screen first, because the last thing I want to do is create more work for me by transferring dirt from some other part of my computer to the screen. The last step is to polish and polish your computer with the dry side of the cloth. That’s it. Your Mac should be looking clean again.
How to organize your hard drive
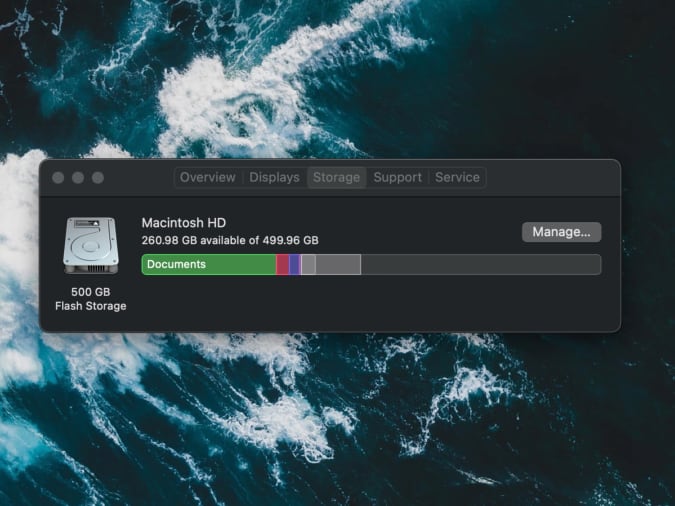
Igor Bonifacic / Engadget
One of the most difficult parts of cleaning your Mac’s hard drive is knowing where to start. After all, most of us have applications on our computers that we don’t even remember installing. Fortunately, macOS comes with a tool to help you with exactly that problem.
Navigate to the “Storage” section of the “About this Mac” menu and click on the “Manage …” option. Here you will find a tool that classifies your files into broad categories and offers recommendations on how to free up space on your hard drive. You can use them in combination with the handy “Show in Finder” button at the bottom of the interface to quickly browse your hard drive. There is no need to search for files manually.
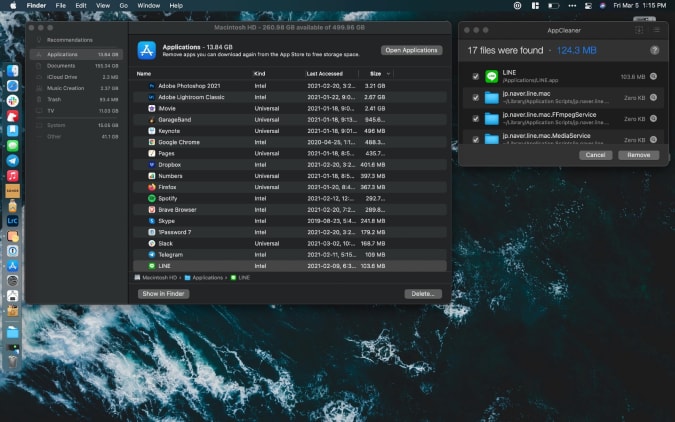
Igor Bonifacic / Engadget
The section dedicated to applications is particularly useful, as you can see the last time you used a program, as well as whether it is no longer compatible with the operating system or if it is out of date due to a newer version.
You don’t need me to tell you to uninstall programs you don’t use, but what you may not know is that there is a better way to delete them than to simply drag them to the trash. A free program called AppCleaner will help you to track any files and folders that would be left behind if you were just deleting an application.
After deleting all unnecessary applications, go to the documents section. The name is a little misleading here, as you will find more than just text files and Excel spreadsheets. Documents, in this case, end up being the general term of the tool for a variety of files, including those that take up a lot of space and DMGs that you may have forgotten to unmount. The other sections of the sidebar are self-explanatory. The only other thing I will mention is that if you have been using an iPhone for some time, there is a good chance of having old iOS backups stored on your computer. You can also safely delete them.
Igor Bonifacic / Engadget
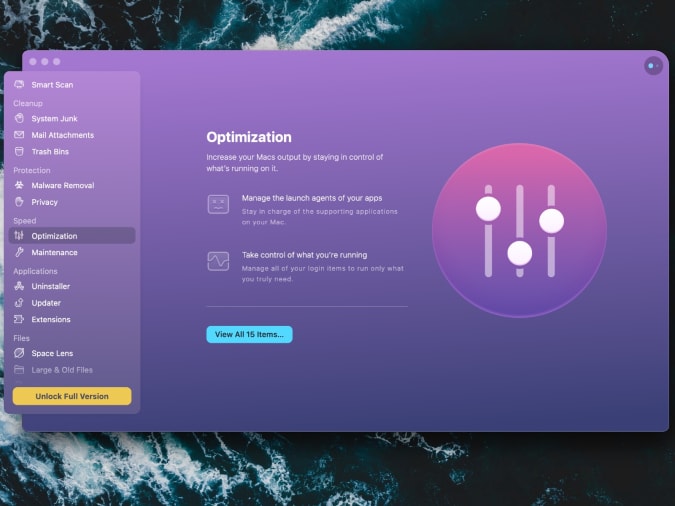
At that point, your hard drive should be in very good condition. If you want to take some additional steps to clean it up, there are dedicated apps that can help. I like a so-called CleanMyMac X. For $ 51 a year, it’s expensive, but it will save you the time and hassle of doing everything I mentioned above (and a little more) on your own. It also functions as a malware removal tool.
Tips and tricks for keeping a desktop and finder organized
Igor Bonifacic
Let’s start with the menu bar. It may not technically be part of the work area, but a well-organized area can go a long way in making everything else look less cluttered. My recommendation here is to download a $ 15 app called Bartender. At first glance, it is a simple program that allows you to hide unwanted items from the menu bar behind a three dot icon. However, the strength of Bartender is that you have a lot of customization options. For example, you can set a trigger that will automatically move the battery status icon out of hiding when the computer is not plugged into an outlet.
Since we’re talking about the menu bar, take a second to open your Mac’s System Preferences menu and go to the “Users and Groups” section. Now click on the “Login Items” tab at the top of the interface and take a look at all the applications that are started when you boot your system. You can speed up your system by reducing this list to just the programs you use most often.
When it comes to the work area itself, the best advice is less and more. Nothing will make your computer look like a cluttered mess more than a busy work area. Folders and stacks can help, but for most people, I suspect part of the problem is that they use the desktop as a way to quickly and easily find files that are important to them.
Igor Bonifacic / Engadget
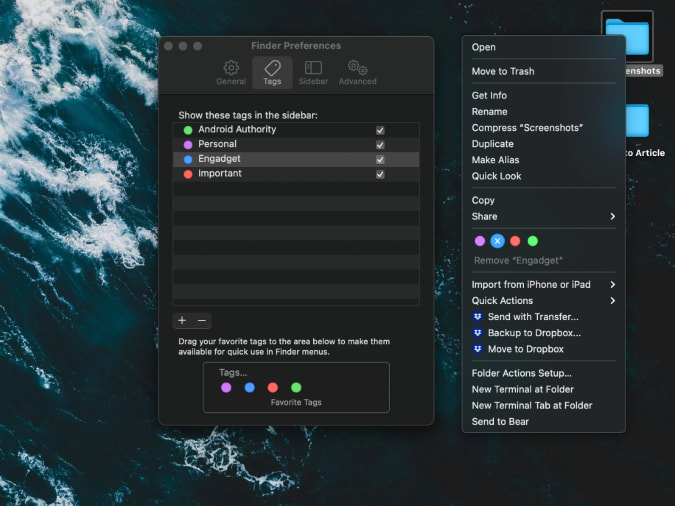
If you’ve ever had trouble finding a specific file or folder on your computer, try using the Mac’s markup features. Start by opening the Finder preferences menu (“Command” + “,”) and click on the “Tags” tab. You can use the standards provided by macOS or create your own. Either way, drag the ones you think you’ll use most often to the favorite areas at the bottom of the preferences window. This will make them easily accessible when you want to use them. To attach a tag to a file or folder, click on it while holding down the ctrl key and select the one you want from the drop-down menu. You can also tag a file while working on it within an application. Remember that you can apply multiple tags to a single file or folder. You can even apply them to applications.
What makes tags so useful in macOS is that they can appear in the Finder’s sidebar and are easily searchable directly through the Finder or using Siri. As long as you have a system for organizing your files, however simple, it will be easier to control them. As an example, I like to apply an Engadget tag to any file related to my work. I’ll add an “Important” tag if it’s critical and I want to find it quickly.
How to organize your windows and guides
Igor Bonifacic / Engadget
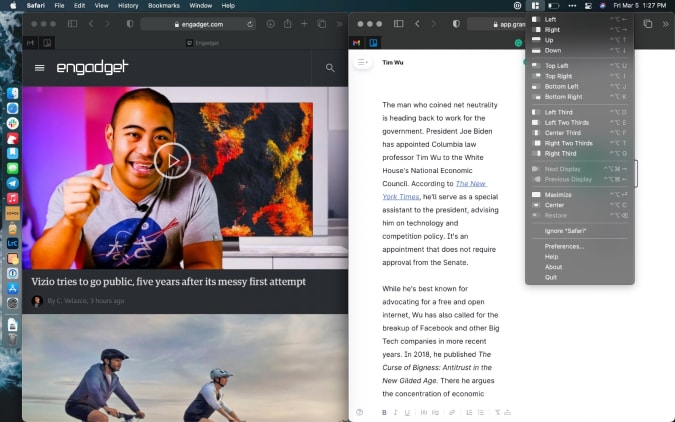
There is one last application that I would like to suggest at the end of this article. If you’ve used macOS and Windows 10, you know that Apple’s operating system doesn’t come with the best window management tools. You can click and hold the full-screen icon to tile a window to the left or right of the screen, but that’s about it and the feature has always seemed less accurate than its Windows counterpart.
My suggestion is to download an application that replicates the Windows 10 tuning feature. You have several competing options that offer more or less the same functionality. My favorite is a $ 5 program called Magnet. If you want a free alternative, take a look at the Rectangle. Another option is BetterSnapTool, which offers more functionality than Magnet, but does not have such a clean interface. All three applications offer many more ways to configure your windows than you get through the built-in tool in macOS. They also come with shortcut support, which means that you can quickly set up your windows and get to work.